Integration in OXID eShop
Use our module for OXID eShop to automatically integrate POWER CAPTCHA into your shop. You can individually select the areas or forms, you would like to protect.
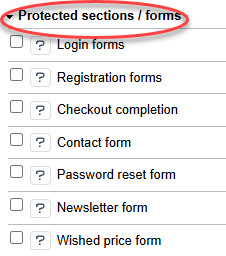
The following sections / forms are currently supported:
- Login forms
- Registration forms
- Checkout completion
- Contact form
- Password reset form
- Newsletter form
- Wished price form
The following describes how to install, activate and configure our OXID module.
Preconditions
- You have purchased a POWER CAPTCHA license and entered the domain of your store in the “My Account” section on power-captcha.com (see Getting started).
- You have installed OXID eShop in version 6.5 or 7.1.
- You use one of the default themes (APEX, Flow, Wave, Azure) or a child theme. When using custom themes, modifications may be necessary.
Install the module
The module is installed on commandline via Composer.
-
First open an SSH connection with the server on which the shop is installed.
-
Navigate to the root directory of your shop. You can identify the root directory as it contains the composer.json file, among other things. Example:
cd /var/www/oxideshop/
-
To download and install the module, execute one of the following commands in the root directory - depending on the OXID version used:
OXID 7.1
composer require power-captcha/integration-oxid-eshop:^2.0.0OXID 6.5
composer require power-captcha/integration-oxid-eshop:^1.0.0
Once the installation process is complete, the module is displayed in the OXID administration under “Extension ⇨ Modules”.
Activate the module
-
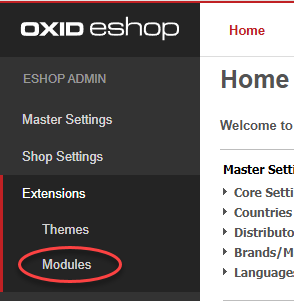
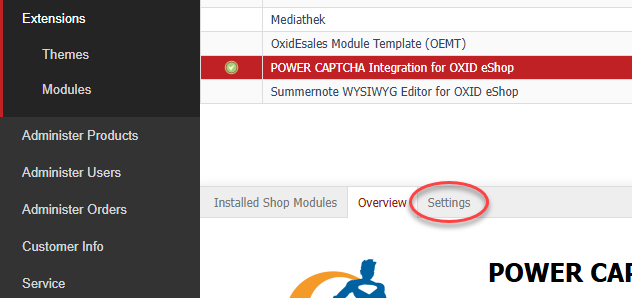
Log in to the administration area of your shop. Click on “Extension” in the navigation on the left-hand side and then on “Modules” (see illustration).
-
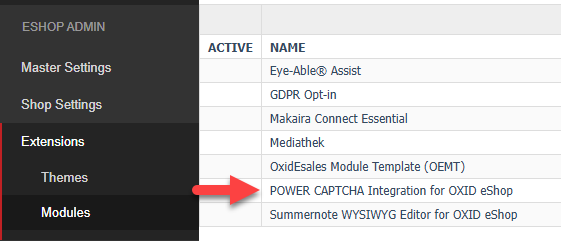
The module list opens in the right-hand area. Click on the module “POWER CAPTCHA Integration for OXID eShop” (see illustration).
-
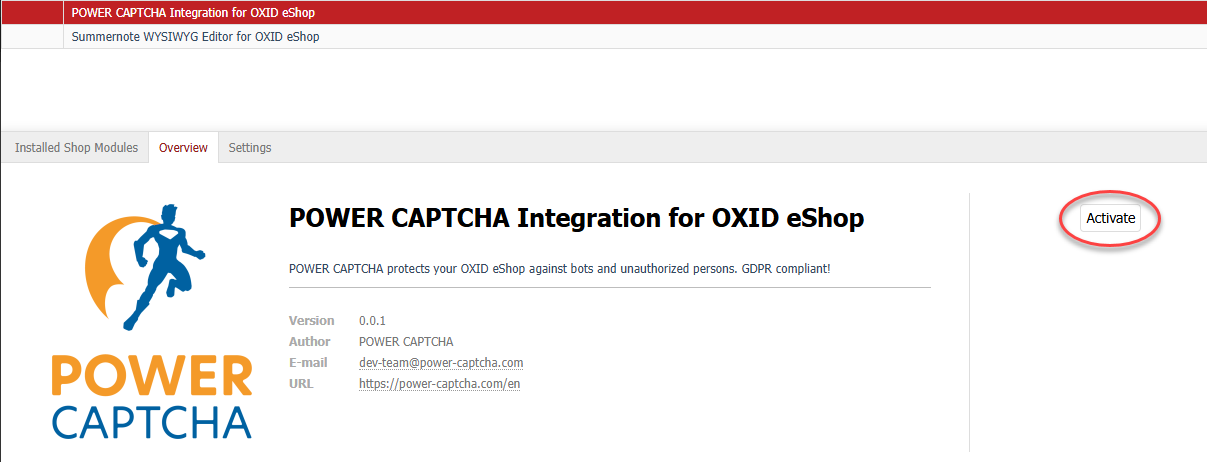
The “Overview” tab of the POWER CAPTCHA module is displayed in the area below. Click on the “Activate” button there. The button is located on the right-hand side of the screen (see illustration).
Once the module has been activated, a green checkmark is displayed next to the POWER CAPTCHA module in the module list (see illustration).

Configure the module
In order for the module to function, an API key and a secret key must be specified in the module settings.
Furthermore, sections / forms that you want to protect with POWER CAPTCHA must be selected in the module settings.
-
Navigate to the administration area “Extension ⇨ Modules” and click on the POWER CAPTCHA module in the module list.
-
Then click on the “Settings” tab (see illustration).
-
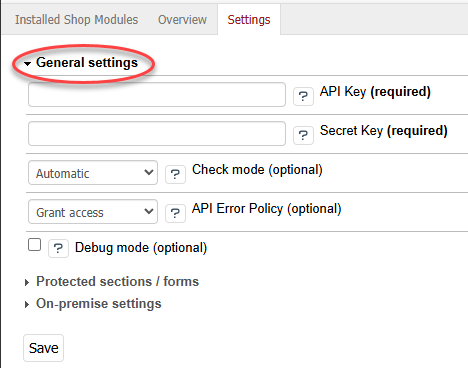
The settings page of the POWER CAPTCHA module opens. Click on “General settings” to display the settings fields (see illustration).
-
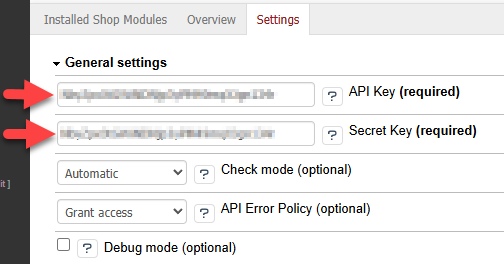
Enter your POWER CAPTCHA API key in the “API Key” field and your secret key in the “Secret Key” field (see illustration).
 Note
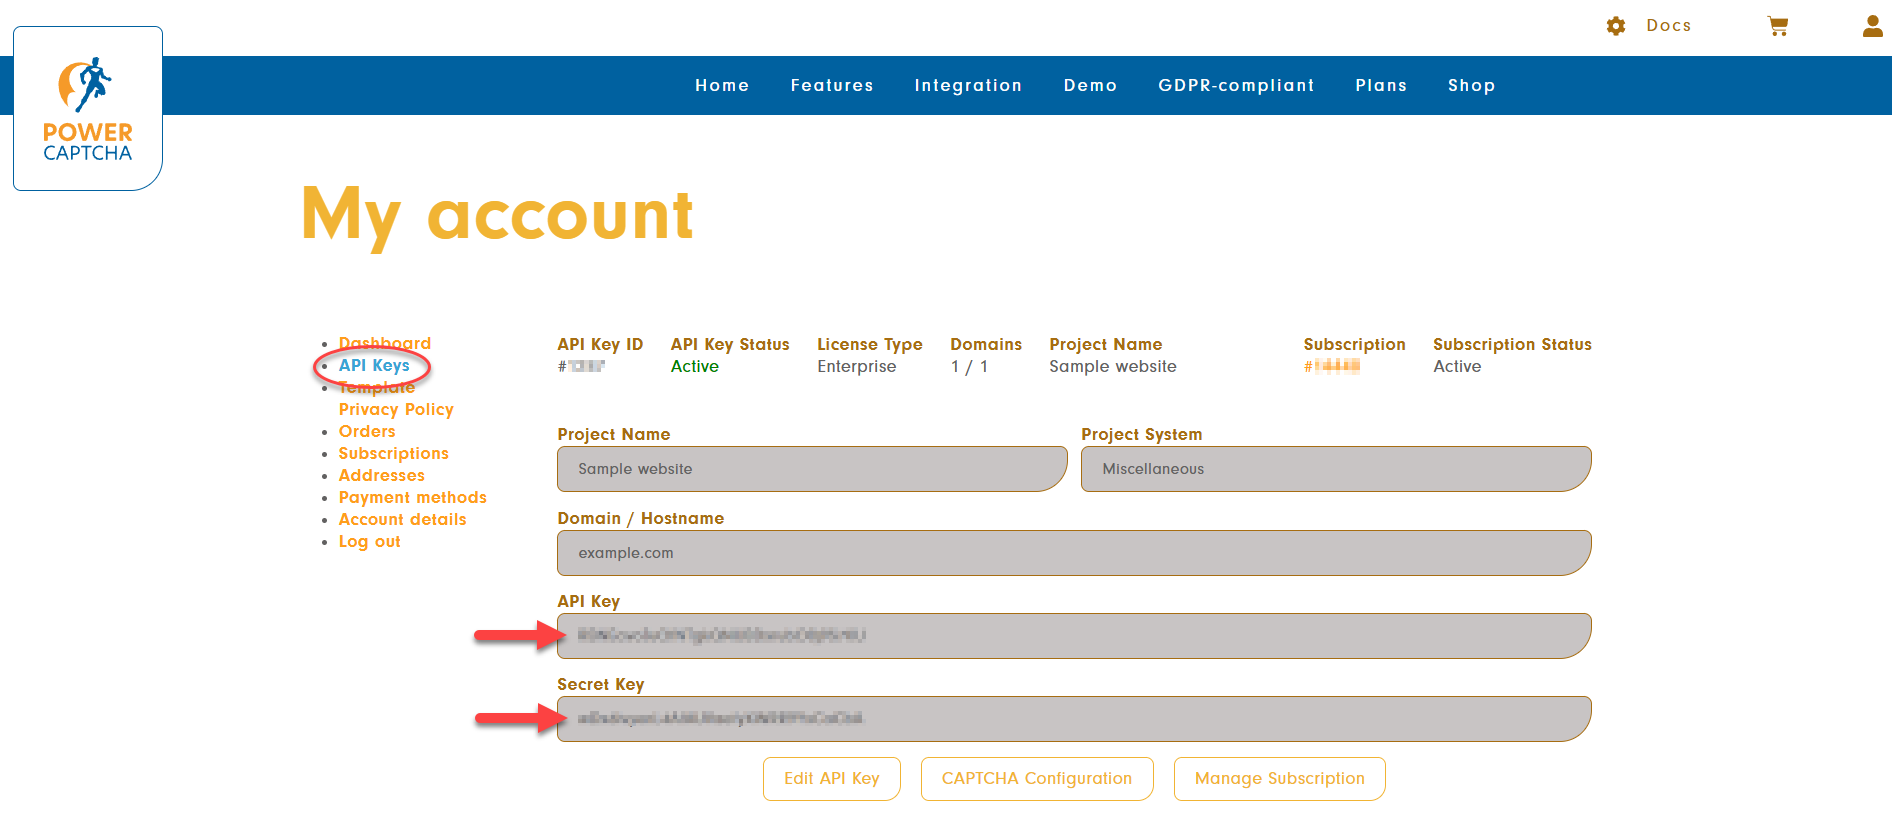
NoteYou can find the API key and secret key in the “My Account” section on power-captcha.com under the menu item API Keys (see illustration).
Please also make sure that the domain of your website is entered in the “Domain / Hostname” field.
Further information can be found in our FAQ.
-
If needed, you can also define the check mode and the behavior in case of API errors in the general settings, as well as activate the debug mode. Further information about the settings is displayed when you click on the “?” symbol next to each settings field.
-
Now click on “Protected areas / forms” to select which sections or forms of your shop should be protected with POWER CAPTCHA (see illustration).
-
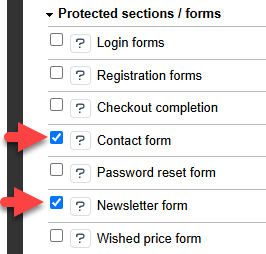
Select the checkbox for the sections or forms that should be protected with POWER CAPTCHA. For example, “Contact form” and “Newsletter form” (see illustration). You can find further information to each section by clicking on the “?” symbol.
-
Once you have entered your API key and secret key and selected the protected sections, you can click on the “Save” button at the bottom to apply the settings (see illustration).
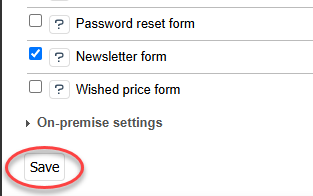
The settings under “On-premises settings” are only relevant if you are using an on-premises solution with a self-hosted POWER CAPTCHA endpoint. Normally, you can leave both fields empty.
Result
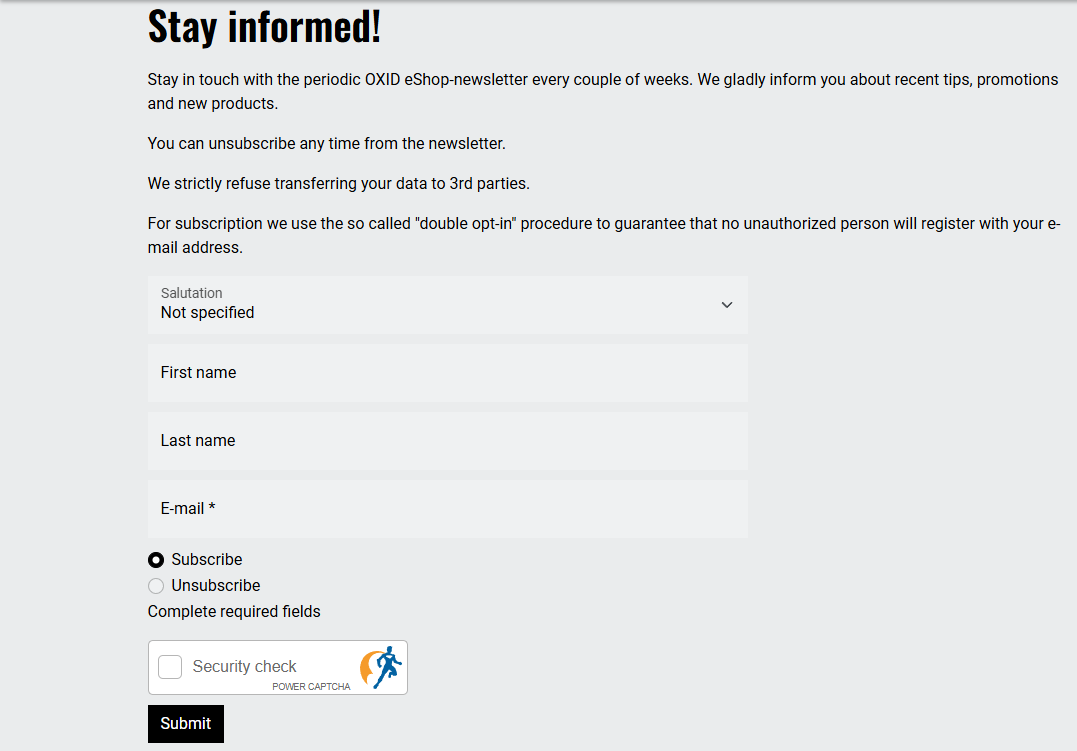
Once you have configured the POWER CAPTCHA module, the POWER CAPTCHA widget is displayed in the selected sections or forms (in case the check mode is set to “Automatic” or “Manual”). An example is shown below for the newsletter form.