Integration in WordPress
Use our official plugin for WordPress to integrate POWER CAPTCHA into various areas of your WordPress website. You can individually choose which areas or forms should be protected.
Supported plugins and forms:
- WordPress login
- WordPress registration
- WordPress password forgotten
- WooCommerce login
- WooCommerce registration
- WooCommerce password reset
- WooCommerce Checkout
- WPForms
- WPForms lite
- Elementor Pro Forms
- Contact Form 7
In the following, we describe how you can install, activate and configure our WordPress plugin.
Install WordPress plugin
Installation within your WordPress website
First go to the administration area / dashboard of your WordPress website and click on the menu item Plugins > Add Plugin.
Enter “POWER CAPTCHA” in the search field (plugin search) (see illustration).
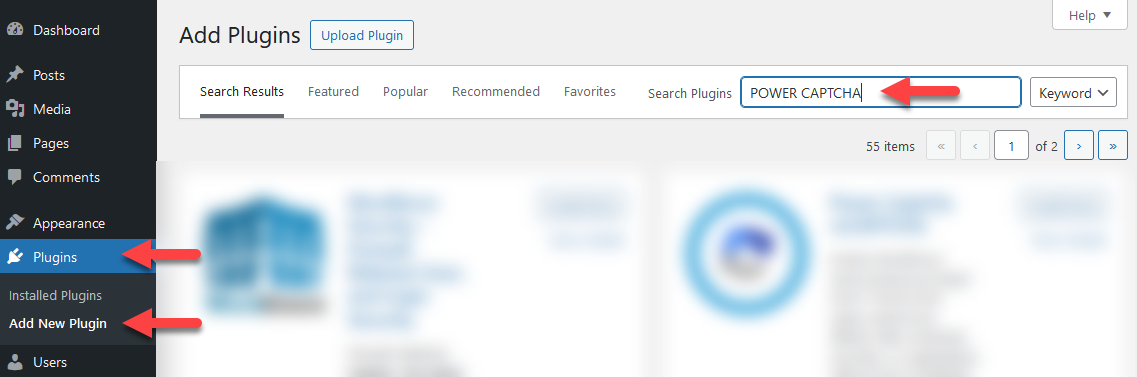
Scroll through the search results to the POWER CAPTCHA plugin and click on the Install Now button (see illustration).

After successful installation, the button changes to Activate. Click the button to activate the POWER CAPTCHA plugin (see illustration).

Alternative installation option: Manual installation
First download the plugin as a ZIP file in the WordPress Plugin Directory.
Then go to the administration area / dashboard of your WordPress website and click on the menu item Plugins > Add Plugin.
Click on the Upload Plugin button at the top and select the ZIP archive that you previously downloaded
(e.g. power-captcha.1.2.8.zip). Then click on Install Now.
After the upload and installation, a page will open where you can activate our POWER CAPTCHA plugin.
Configuration of the plugin
General settings
After activation, you can configure the plugin.
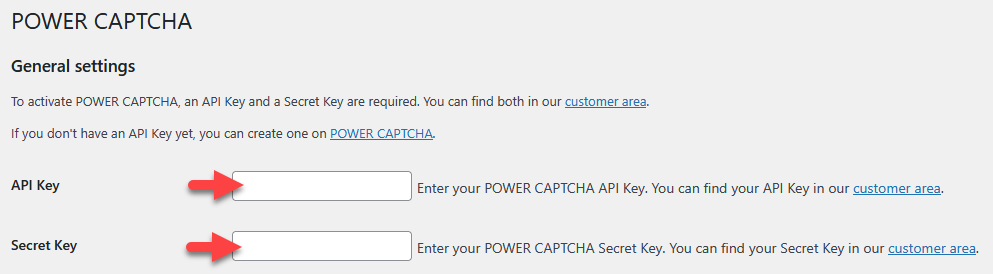
To do so, go to Settings > POWER CAPTCHA in the administration area of your WordPress website and enter your API key and secret key in the corresponding fields under General settings (see illustration).
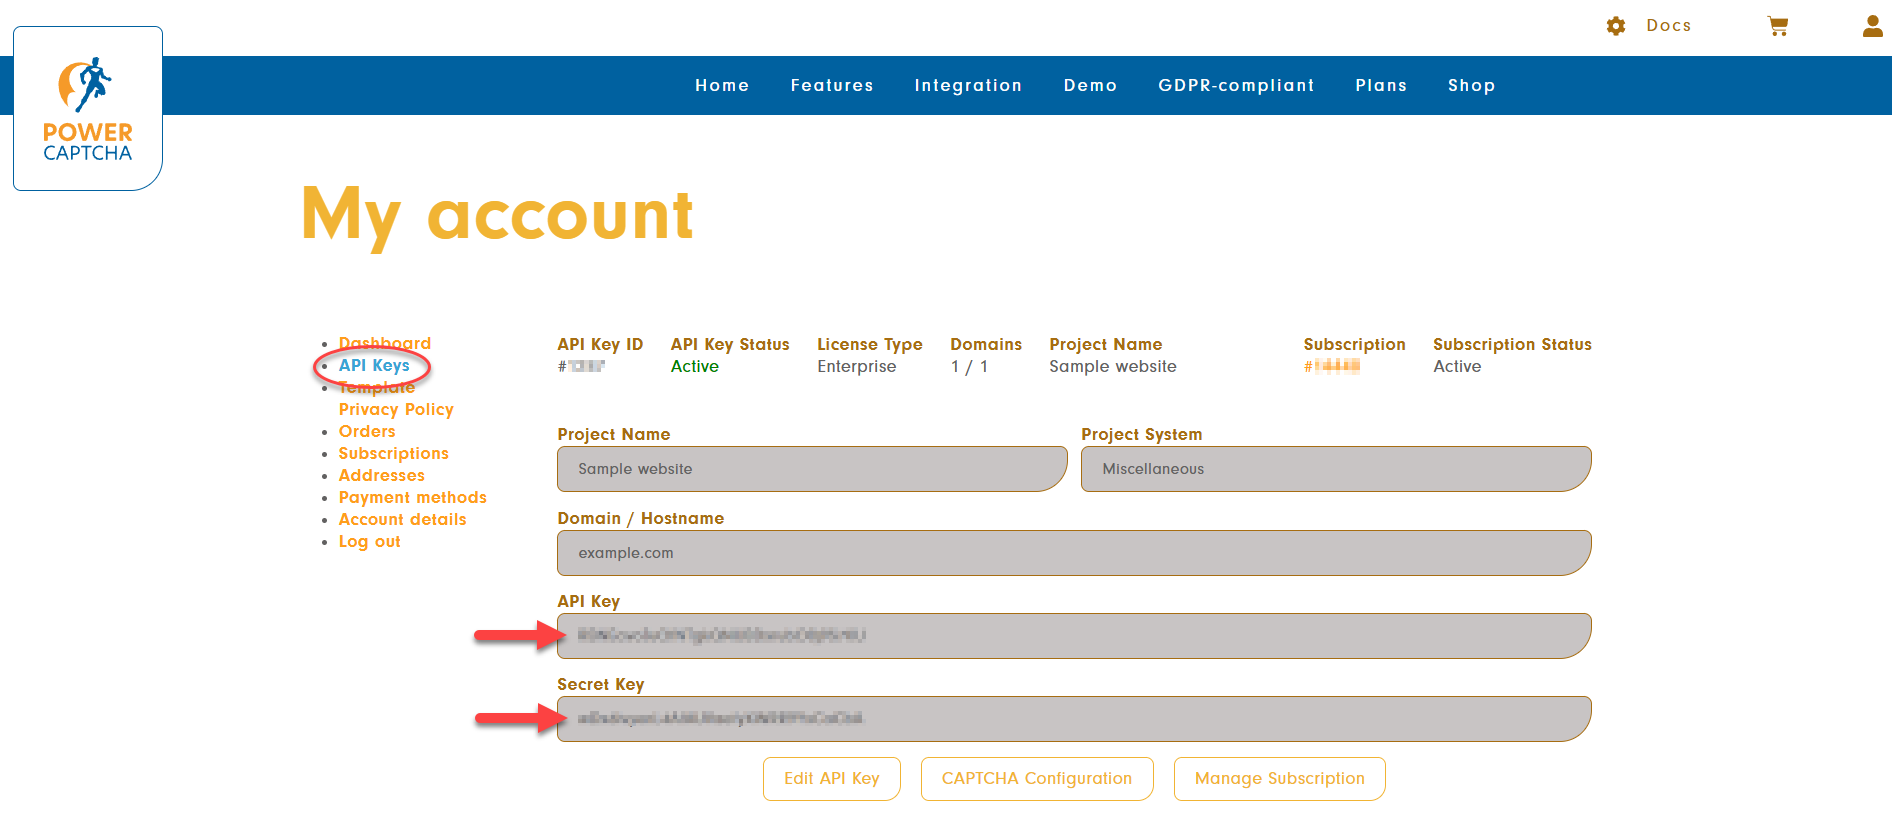
You can find the API key and secret key in the “My Account” section on power-captcha.com under the menu item API Keys (see illustration).
Please also make sure that the domain of your website is entered in the “Domain / Hostname” field.
Further information can be found in our FAQ.
Integration settings
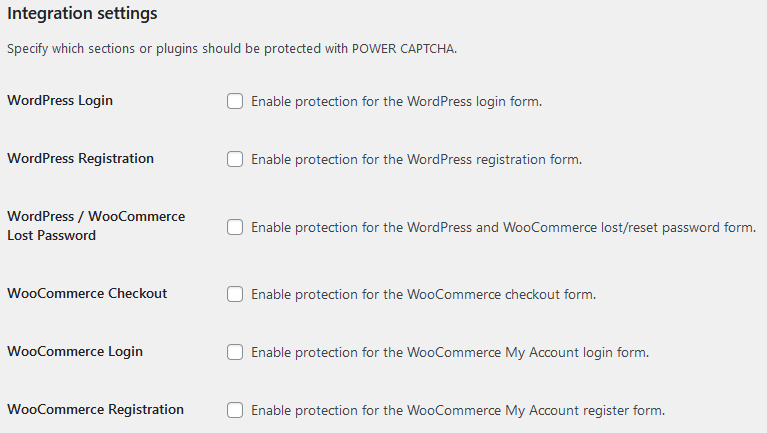
Under Integration settings, you can select the plugin or page area you want to activate POWER CAPTCHA (see illustration).
Captcha settings
Under Captcha settings you can customize POWER CAPTCHA according to your wishes if you do not want to start with the default settings.
Here you can change the behavior of the security check, the display of the widget and the policy for API errors.
On-premises settings
The On-premises settings section is only relevant if you have an Enterprise license and do not use the cloud solution (default), but operate a local POWER CAPTCHA instance.
In this case, you have the possibility to enter the URLs to your locally hosted instance and to your local JavaScript.
All requests will then go to your own instance instead of our server.
If you do not run your own instance, all fields under On-Premises settings must remain empty.
Save settings
When all settings have been edited, click on Save Changes.
POWER CAPTCHA now protects the plugins / areas you have selected.